Project 2 - Fun with Filters and Frequencies
Filip Malm-Bägén
Introduction
This project explores using frequencies to process and combine images. The project shows the process and result of sharpening images by emphasizing high frequencies, extracting edges with finite difference kernels, creating hybrid images by blending high and low frequencies from different images, and blending images at various frequencies using Gaussian and Laplacian stacks.
Finite Difference Operator
Approach
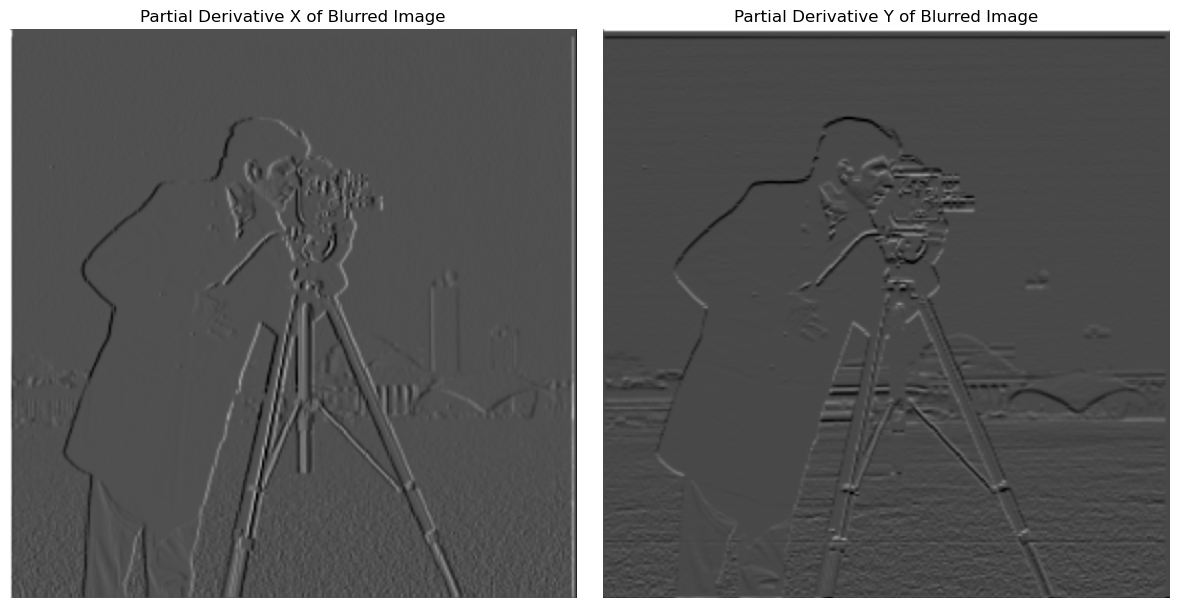
To compute the partial derivatives in the x and y directions of the
"cameraman" image, I first created finite difference kernels as
Numpy arrays: D_x = np.array([[1, -1]]) and
y = np.array([[1], [-1]]). Using
scipy.signal.convolve2d with mode='same',
I convolved the image with these kernels to obtain the partial
derivative images, which represent the changes in pixel intensity in
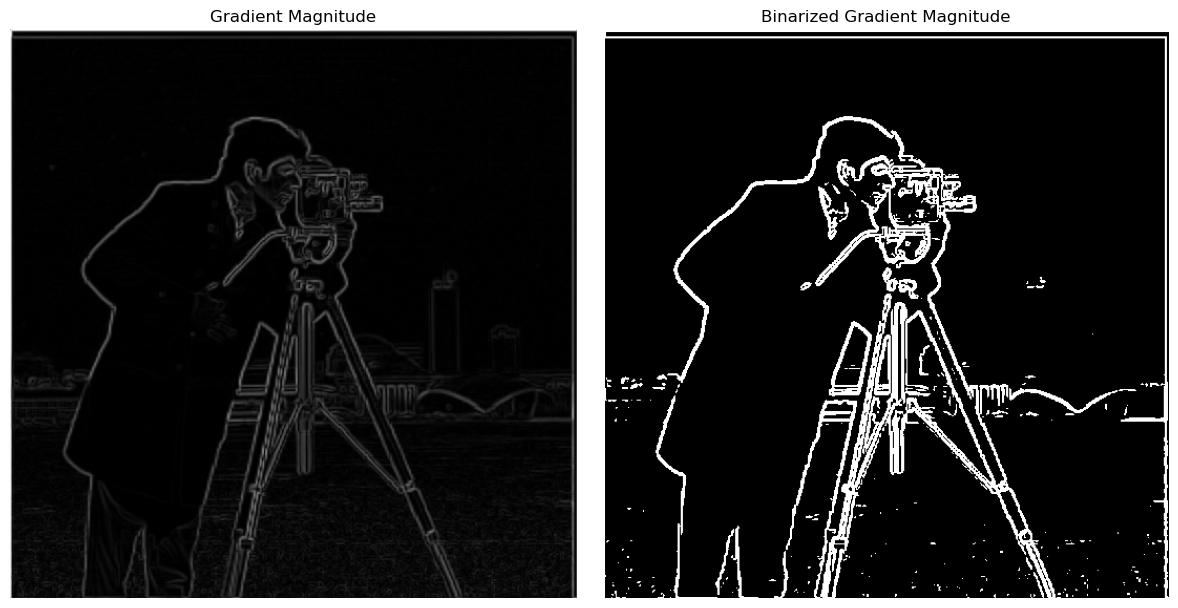
the x and y directions, respectively. Thereafter, I computed the
gradient magnitude image using the formula
np.sqrt(partial_derivative_x ** 2 + partial_derivative_y **
              2)
, which combines the two partial derivatives to highlight the edge
strength at each pixel. To create an edge image, I applied a
threshold to the gradient magnitude image,
Threshold = 0.2. Selecting the threshold value through
trial and error to balance noise suppression with the visibility of
real edges.
Result


Derivative of Gaussian (DoG) Filter
First, the cameraman is blurred using a Gaussian filter, made using
cv2.getGaussianKernel with kernel size
6 and sigma 1.0. Afterwards, the image
gradient magnitude of the blurred image is computed using the same
method as in the previous section. Finally, the blurry gradient
magnitude image is thresholded to create an edge image. The
threshold value was set to 0.05 in order to correspond
to the result of the previous binarized cameraman.
There is a clear difference in the final result. The most obvious one is that the edges are thicker for the binarized edges and rounder that previously.
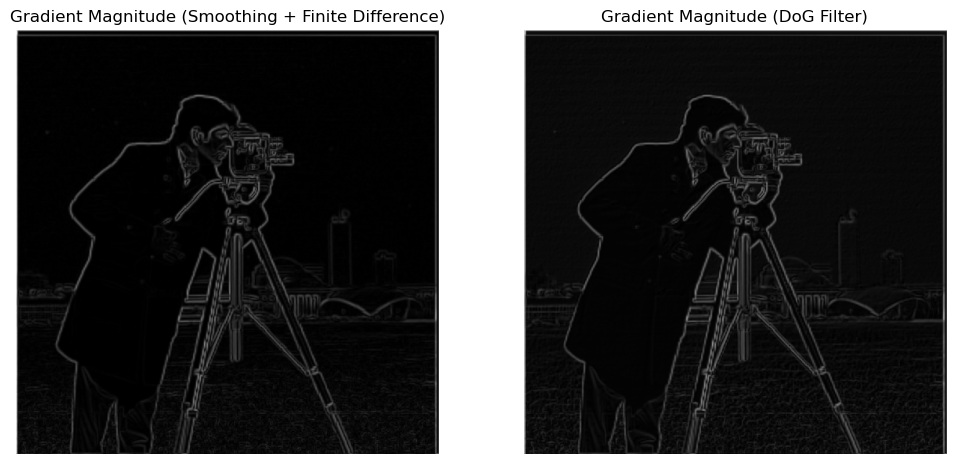
The two images are essentially the same. If looking closely, the grass and other small details differ, but the overall image is the same.
Image "Sharpening"
To sharpen an image, the image was first convolved with a Gaussian
filter, to filter out the high frequencies, which resulted in a
blurry image. The high frequencies were then extracted by
subtracting the blurry image from the original image. Finally, the
high frequencies were added back to the original image to create a
sharpened image, using
sharpened_img = img + alpha * details, where
alpha is a constant sharpening factor.
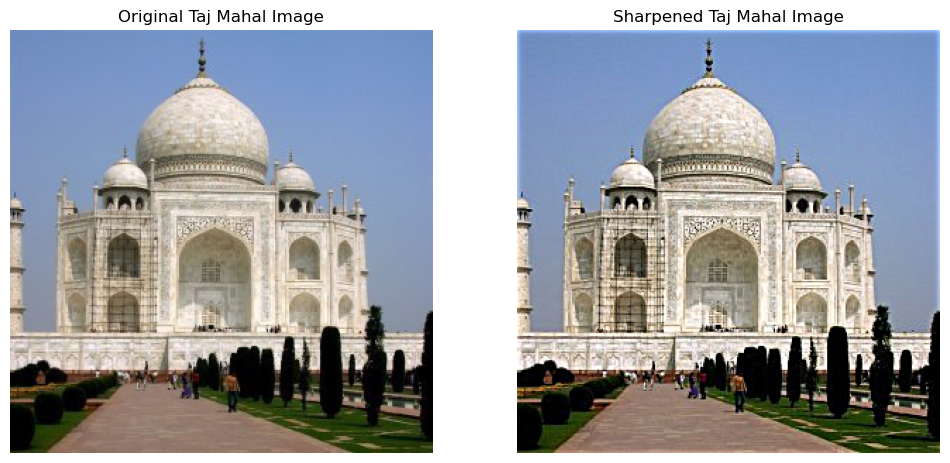
Taj Mahal
The Taj Mahal image was sharpened using a sharpening factor of
0.75. As seen, the sharpened image has more defined
edges and details compared to the original image.
Camera Obscura
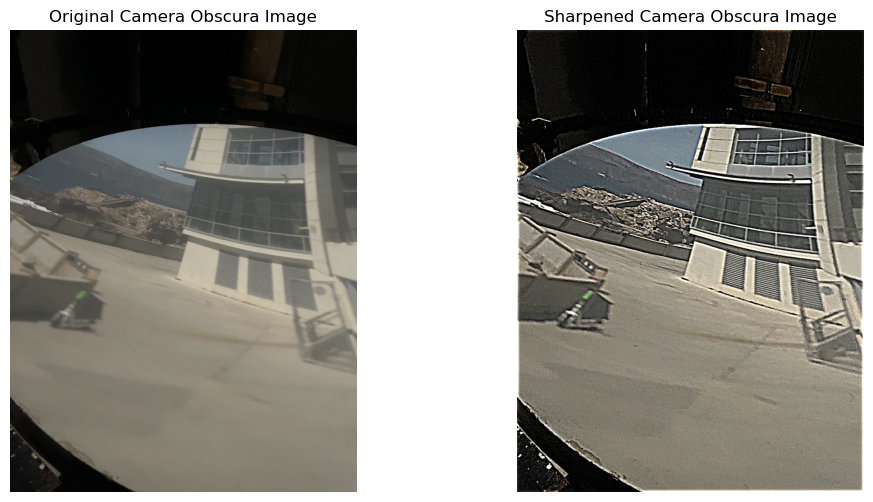
A couple of weeks ago, I had the opportunity to visit the "Camera
Obscura & Holograph Gallery" in San Francisco. It was very
interesing to see how the camera obscura works and how it can be
used to create images. Unfortunately, the resulting image lacked
sharpness... Luckily, I now know an algorithm to sharpen images! I
used alpha = 6.0 and the resulting image is sharper
than ever. The edges around the horizon and windows are much more
defined, but the image is also noisier.
Swedish Midsummer 🇸🇪
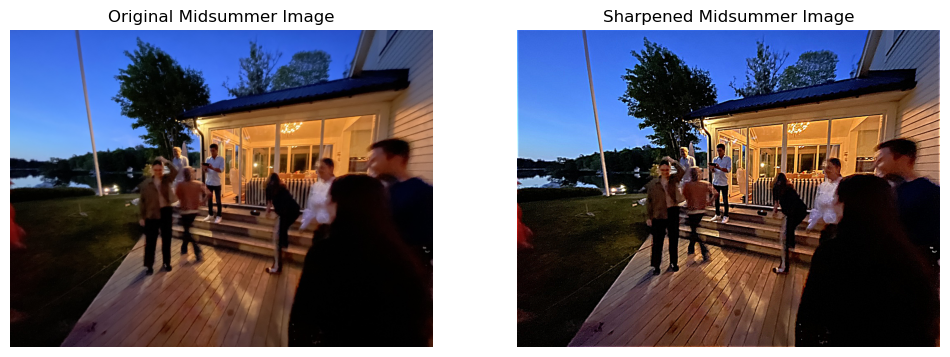
In Sweden, Midsummer is the biggest holiday of the year. We eat a
lot of pickled herring and strawberries, and we celebrate all day
and all night, usually up until the sun rises again. I captured this
image of my friends dancing at midnight, but due to the lack of
light, the image turned out blurry... But by sharpening the image
with alpha = 2.0, the image is now a bit clearer. The
image lacks information to begin with (I can't enhance something
which does not exist), but the edges are more defined than before.
Lena
Finally, the Lena image was first blurred using a Gaussian filter
with kernel = 15 and sigma = 2.0.
Thereafter, I sharpened the image using alpha = 4.0,
with the ambition to make the sharpened image look like the original
image. The sharpened image looks somewhat similar to the original
image. As a measure of similarity, I computed the mean squared error
(MSE) and the Structural Similarity Index (SSIM) between the
original and sharpened images. MSE measures the average squared
difference between the two images. A lower MSE indicates a closer
match between the images. SSIM is a perceptual metric that measures
the similarity between two images. A higher SSIM indicates a closer
match between the images and 0 indicates no similarity. The MSE and
SSIM values were 19 766 and 0.0046,
respectively. The values indicates that the sharpened image is not
similar to the original image at all. This might happen because
sharpening can create new edges and artifacts, making the pixel
values differ a lot. As a result, the metrics show low similarity,
even if the image looks somewhat similar to you.

Hybrid Images
Approach
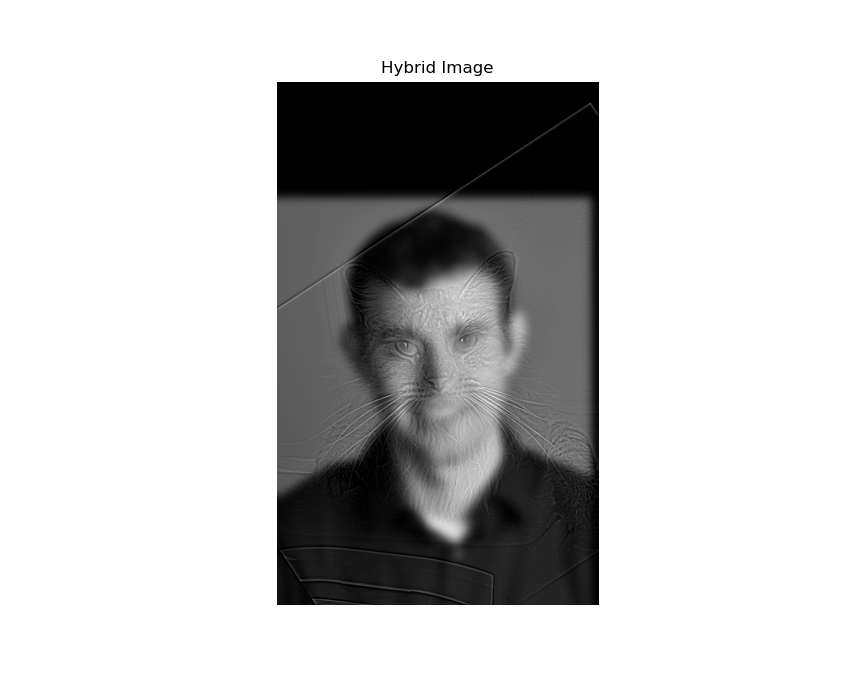
Two images are taken as input: im1 and
im2. A Gaussian blur is applied to
im2 using sigma2 to produce the
low-frequency image low_frequencies. For the higher
frequencies, a Gaussian blur is applied to im1 using
sigma1 to produce blurred_im1, and the
high frequencies are extracted as
high_frequencies = im1 - blurred_im1. Finally,
low_frequencies and high_frequencies are
added together pixel-wise to produce the hybrid image.
The high pass filter has a sigma of 3 and the low pass
filter has a sigma of 10.
Result


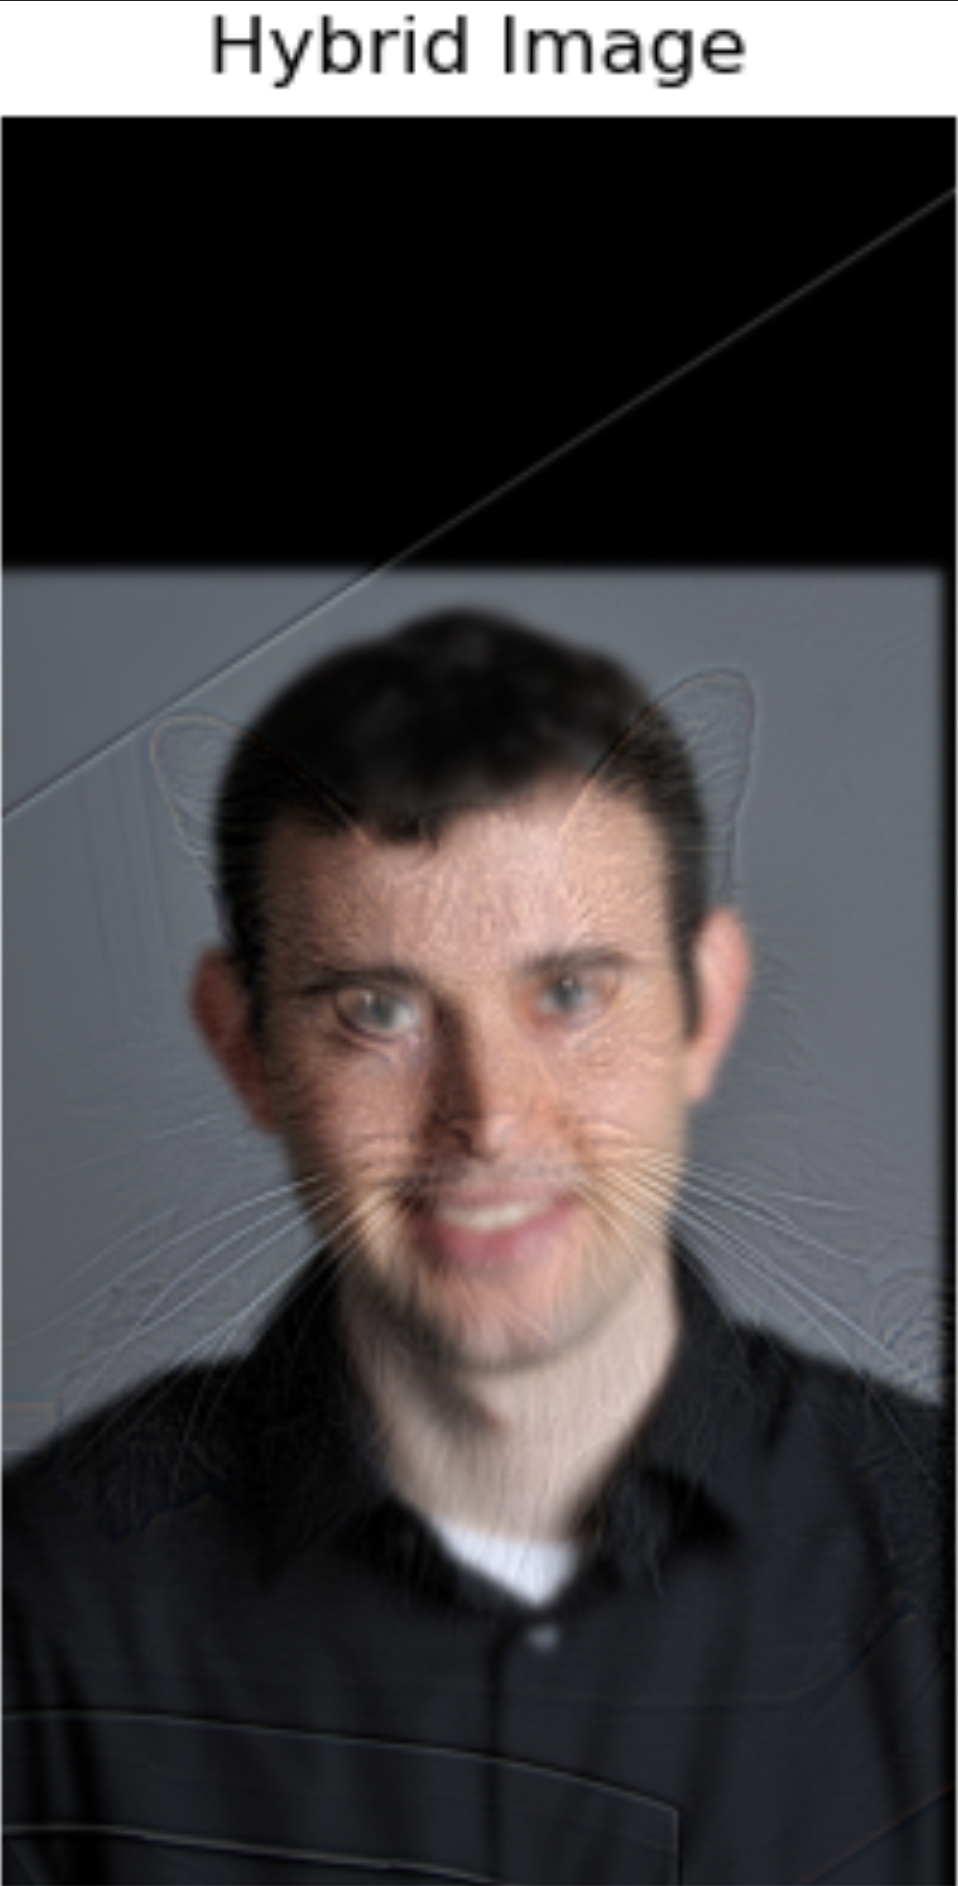
I also experimented with removing the color to see if the effect would be the better or worse. On this image with these specific values, it seems like the effect is better when the images are in black and white. The colors of Derek was too strong in comparason to the high frequencies of Nutmeg. The hybrid image in black and white is more balanced.
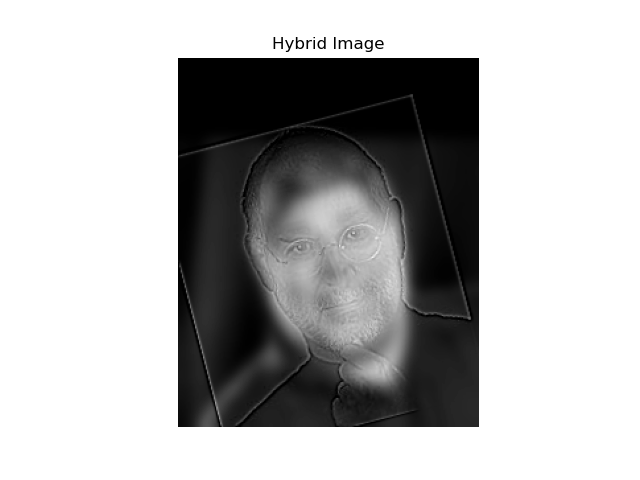
Steve Jozniak
I also tried to create a hybrid image of Steve Jobs and Steve Jobs.
The high pass filter has a sigma of 1 and the low pass
filter has a sigma of 5.
Fourier Analysis
For the Steve Jozniak image, I performed a Fourier transforms to the original input images, the filtered images, and the final hybrid image. This gave the following results.

Failure
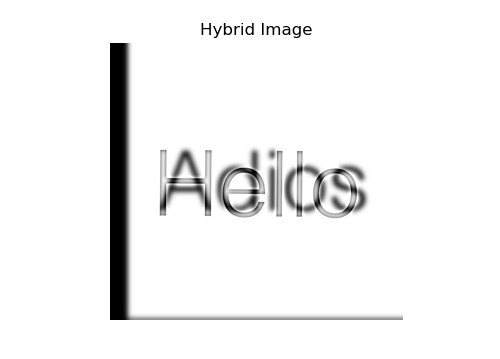
I tried to create this hybrid image where it says "Hello" when the reader is close to the image and "Adios" when the reader is far away. I experimented some with the sigma values but it did not look correct. I belive it can be due to the thin lines. A more bold font migh have been better.


Gaussian and Laplacian Stacks
Approach
Gaussian stacks are generated for each channel of the color images by progressively applying Gaussian blur without downsampling, ensuring that the image size remains constant across all levels. The Laplacian stack is then computed by subtracting consecutive levels of the Gaussian stack, capturing the details lost between the blurred versions at each level, while the final level is the most blurred image from the Gaussian stack. This process is performed separately for each channel of the RGB image, and the stacks are combined to produce multi-level representations that preserve both fine and coarse image details.
Result

levels = 5 and sigma = 2

levels = 5 and sigma = 2
Verification
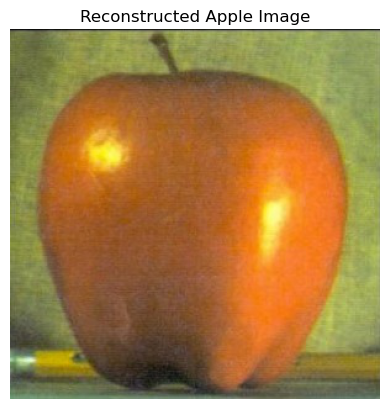
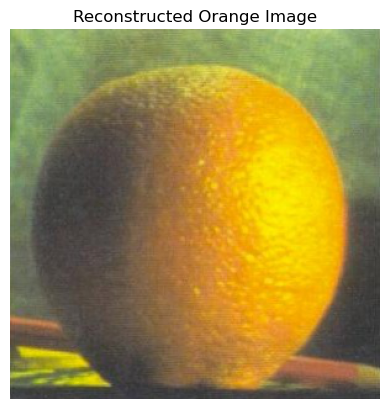
To verify that the algorithm works, the image is reconstructed from the Laplacian stack by progressively adding each level, starting from the most blurred image at the bottom of the stack and moving upwards. The reconstruction process ensures that lost details at each level are reintroduced, with pixel values being clipped to stay within the valid range.
Multiresolution Blending
Approach
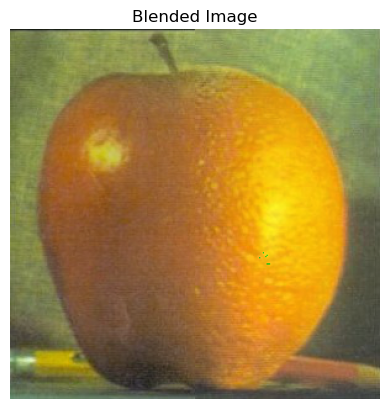
Two images are seamlessly blended using Laplacian stacks and a mask.
A gaussian_stack is first generated for both images and
the mask to capture details at different levels. The
laplacian_stack is then computed by subtracting
adjacent Gaussian levels, highlighting high-frequency details. The
mask, transitioning from 1 to 0, is blurred to create a smooth
blend. The stacks are combined using
blend_laplacian_stacks, and the final image is
reconstructed with reconstruct_image, progressively
adding the levels back.
Result (Orapple)
levels = 4, sigma = 1.0 and
sigma_mask = 64
Irregular mask
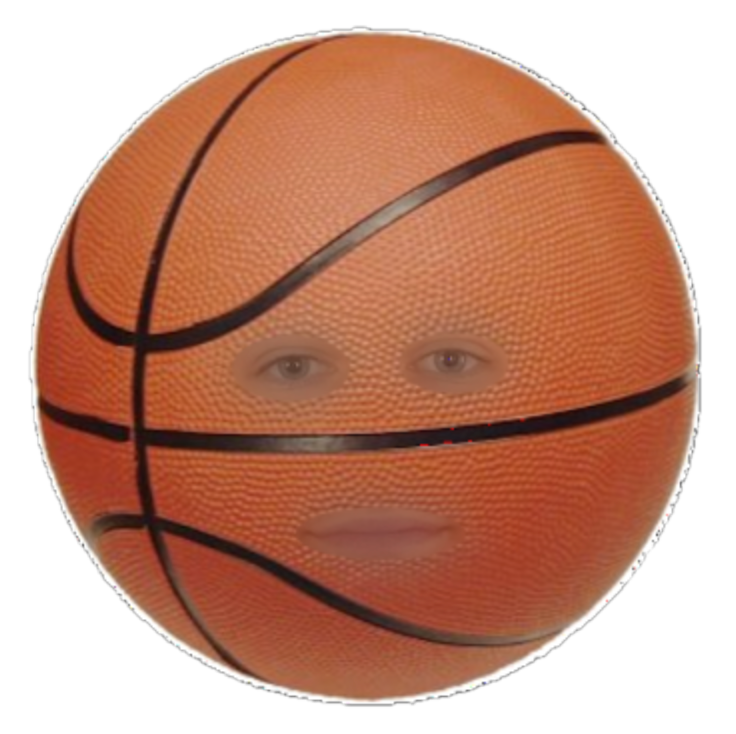
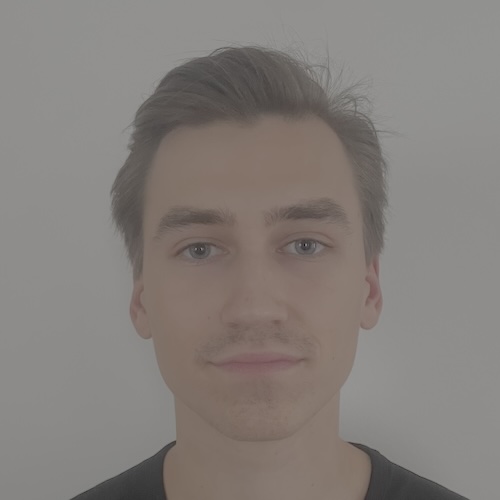
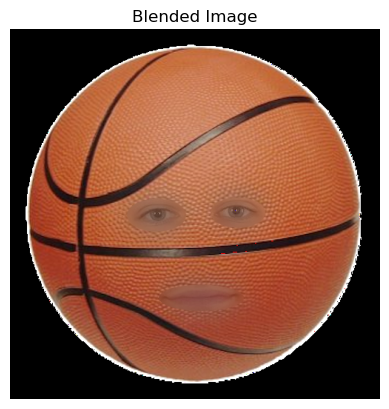
Here i tried to place my face on a basketball. I chose a basketball
because I though a basketball had the most similar color to my
skintone. levels = 8, sigma = 20 and
sigma_code = 8.

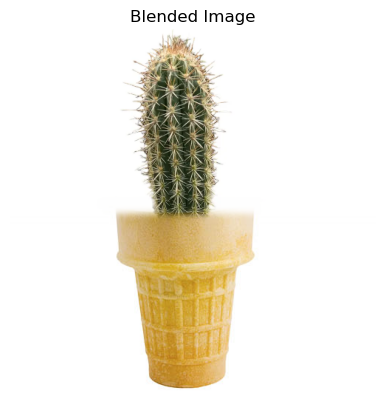
Horizontal mask
For this image, I blended a cactus and an ice cream using a
horizontal mask.
levels = 6, sigma = 0.4 and
sigma_mask = 2
This webpage design was partly made using generative AI models.